Gallipoli Battlefields: Why This WWI Campaign Still Matters
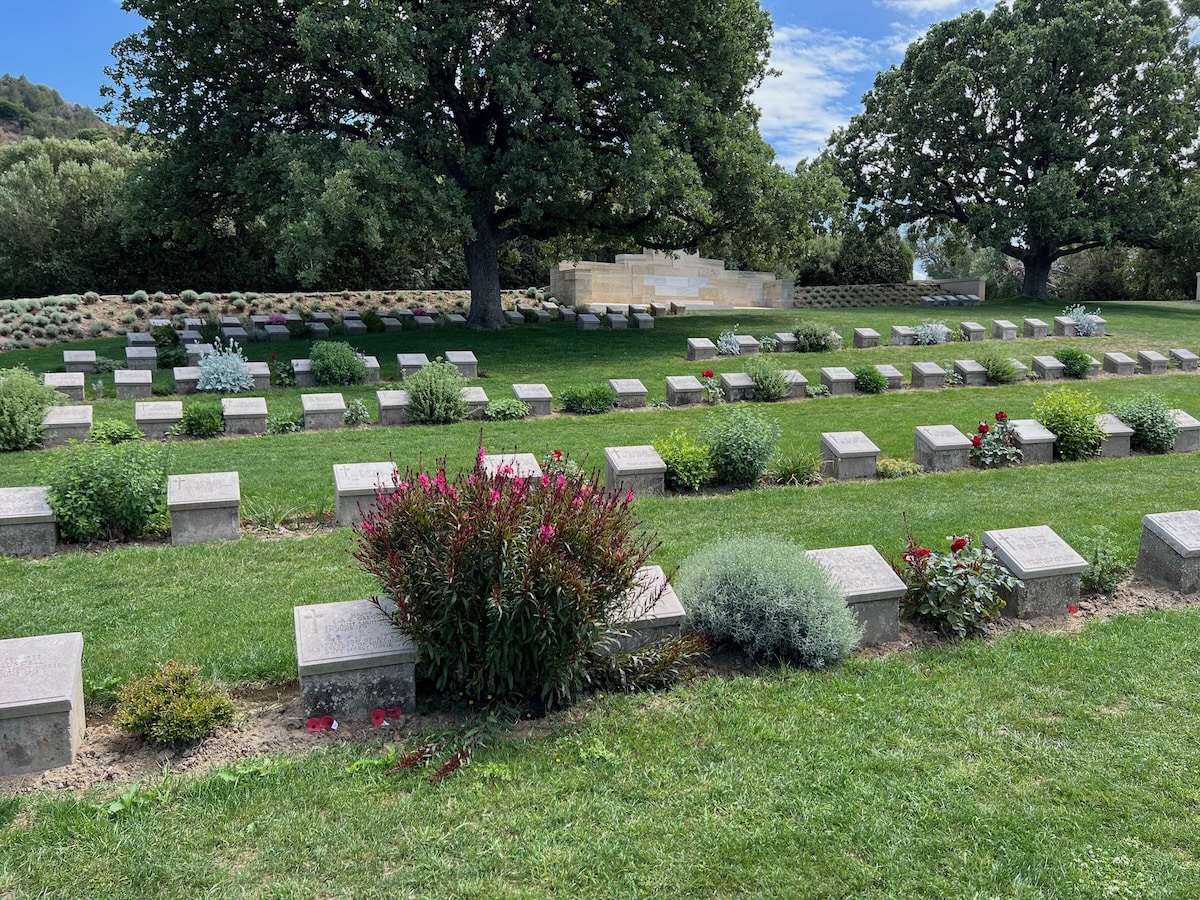
Travellers who stand at Anzac Cove, or walk the long rows of the war cemeteries scattered across the Gallipoli peninsula, often ask some version of the same question: how did this narrow strip of Turkish coastline come to matter so much, to so many different nations, all at once? The answer is a story of miscalculation and improvisation on both sides, of an invasion that went wrong within hours of the first landing, and of a defeat that somehow became a legend, for the Allies who fought there, and even more so for the nation that stopped them.
Why did the Ottomans enter the war at all?
By the early twentieth century, the Ottoman Empire was in steep decline. In 1908 the Young Turks seized power in Constantinople, reducing Sultan Mehmed V to little more than a figurehead. In 1911 the Italo-Turkish War cost the empire large tracts of North Africa, and the Balkan Wars of 1912 and 1913 stripped away most of what remained of its territory in Europe. By 1913 the Ottoman army was in such poor shape that the Young Turks brought in a German officer, Liman von Sanders, to help retrain and reorganise it, part of a wider German military mission that had been advising the Ottomans for years.
Britain, France and Germany were all jostling for influence in Constantinople as war approached. In 1914, two modern battleships were being built for the Ottoman navy in British yards, paid for in part by public subscription back home. As the crisis in Europe deepened and it became unclear which side Turkey might join, Winston Churchill, then First Lord of the Admiralty, requisitioned both ships for the Royal Navy in the summer of 1914, just as their Ottoman crews were arriving in England to take delivery of them. It was a pragmatic decision, but a deeply unpopular one in Constantinople.
Germany stepped in with two replacement warships, still crewed and commanded by Germans, and in late October 1914 they were sent into the Black Sea, where they shelled Russian ports including Odessa. The raid was engineered by the German admiral commanding the ships in coordination with the Ottoman war minister, Enver Pasha, over the objections of ministers who wanted to stay neutral, and it achieved exactly what its architects intended: on 31 October 1914 the Ottoman Empire entered the war on the side of the Central Powers. The British ambassador left Constantinople within days.
The Sultan himself was said to be dismayed, believing a war with Russia was close to suicidal. His fear made sense: Russia depended on the Bosphorus and the Dardanelles for trade, and although the straits had stayed open before the war, the Ottomans now began mining them.
The Entente had three further reasons to look towards Gallipoli. The Western Front had already hardened into trench stalemate by the end of 1914. An attack in the west of Turkey might force the Ottomans to divert troops from their campaign against Russia in the Caucasus. And there was a hope, probably an optimistic one, that a strike towards Constantinople might draw Greece and Bulgaria into the war on the Entente’s side. Winston Churchill was the one who first proposed forcing the Dardanelles by sea, using a fleet of older warships the navy could afford to lose to the minefields. If the fleet had enough weight of fire, he argued, it could punch its way through to Constantinople itself.
Could the navy really force the straits alone?
The naval attack opened on 19 February 1915 with a bombardment of the Ottoman forts guarding the mouth of the Dardanelles. Bad weather slowed the operation, but by 25 February most of the outer defences had been silenced.
The main assault came on 18 March, when an Entente fleet of eighteen battleships, cruisers and destroyers tried to force its way through the straits. The attempt failed badly: several battleships were sunk or crippled, mostly by a line of mines the Ottomans had laid just days earlier in a stretch of water the Allies believed was already clear.
That single afternoon is still commemorated today throughout Çanakkale, the town nearest the straits, which takes its university’s name, 18 Mart Üniversitesi, directly from the date. It was also the date deliberately chosen, more than a century later, for the opening of the 1915 Çanakkale Bridge, a vast suspension bridge across the Dardanelles completed in 2022 and named for the year of the battle.
Why did the landings go wrong within hours?
Even after the naval failure, Lord Kitchener, the Secretary of State for War, remained convinced the straits had to be taken. He appointed General Sir Ian Hamilton to command a Mediterranean Expeditionary Force of some 78,000 men. Among them were Australian and New Zealand troops who had been training in Egypt on their way to France, hastily redirected and formed into the divisions that would become known simply as ANZAC.
It took the Entente five weeks to prepare, time lost to poor weather, patchy aerial reconnaissance and the logistics of moving troops up from Egypt. That delay bought the Ottomans time too. Defence of the peninsula fell to the Ottoman Fifth Army under Liman von Sanders, a force of conscript soldiers led partly by German officers, not always easily, given the language barrier and disagreements over strategy. One of Sanders’s divisional commanders, an officer named Mustafa Kemal, knew the peninsula well from earlier fighting in the Balkan Wars. He judged, correctly, that the high ground would decide the battle, and that the Allies would land somewhere around the southern tip of the peninsula.
The plan that emerged called for British troops to land at the very tip of the peninsula, at Helles, while a separate ANZAC force of around 25,000 men landed further north near Gaba Tepe, with orders to push inland and cut the Ottoman supply lines across the peninsula’s neck. A French force would stage a diversionary landing across the straits at Kum Kale.
What happened at Helles on the first day?
On the night of 24 April, troops began boarding small boats to be towed towards the beaches. The Helles landing, made by the 29th Division, went in on five beaches arranged in an arc around the tip of the peninsula, code-named S, V, W, X and Y from east to west.
The heaviest fighting came at V and W beaches. At V Beach, beneath the old fortress of Seddülbahir, the covering force landed from a converted collier, SS River Clyde, run deliberately aground so troops could reach the shore along ramps cut into her sides. The Royal Dublin Fusiliers went ashore here in open boats alongside them; the Lancashire Fusiliers landed at W Beach in the same way. On both beaches the Ottoman defenders, dug into strong positions above the sand and behind barbed wire, inflicted terrible casualties on troops with nowhere to take cover. Of the first 200 men to leave River Clyde at V Beach, only 21 reached the shore.
The Allied losses were catastrophic. So few men were left afterwards from the Dublin and Munster Fusiliers that the survivors were amalgamated into a single unit, nicknamed the Dubsters. Of the 1,012 men of the Royal Dublin Fusiliers who had landed, only 11 are said to have come through the whole Gallipoli campaign unscathed. It took until 26 April, after further heavy fighting, for the Allies to finally secure Seddülbahir.
And what went wrong at Anzac Cove?
Further north, the story was just as chaotic, if for different reasons. Around 2am on 25 April, an Ottoman lookout on the hill above Ari Burnu spotted a fleet of ships offshore, but cloud soon hid the moon and the ships slipped from view. Even after the landing began, the Ottoman high command could not be sure whether this was the main invasion or a feint, not least because Liman von Sanders himself had convinced himself the real attack would come much further north, at Bolayır, and stayed there for several days after the landings began, a misjudgement that left the peninsula’s defenders without clear direction when it mattered most.
The ANZAC force, meanwhile, had troubles of its own. Boats and current carried the landing more than a kilometre north of its intended beach, onto ground that rose far more steeply than the maps had suggested. Only two Ottoman companies held this stretch of coast, but the high ground gave them every advantage, and the terrain, a maze of ravines, spurs and thick scrub, broke the Australian advance into small, disconnected parties almost as soon as it began. A handful of men reached the second ridge; almost none reached their intended objectives.
It was here, on the slopes leading up towards the height later known as Chunuk Bair, that Mustafa Kemal’s own regiment, the 57th, ran out of ammunition and faced the advancing Australians with bayonets alone. His order to them has become one of the most quoted lines of the entire campaign: “I do not order you to fight, I order you to die. In the time which passes until we die, other troops and commanders can come forward and take our places.” Every man of the regiment was killed or wounded, but the line held.
By evening, Australian commanders were recommending re-embarkation. The navy told Hamilton it was impossible, so he ordered the men to dig in instead. The Ottoman counter-attack was eventually beaten back, and by nightfall the Australians and New Zealanders held a cramped perimeter running from Walker’s Ridge in the north to Shell Green in the south, at a cost of around 2,000 men killed or wounded on the first day alone.
Did anything go right for the Allies?
Very little, in those first weeks, except for one remarkable episode. An Australian submarine, AE2, forced its own way up the Dardanelles and spent five days at large in the Sea of Marmara, doing enough damage, and causing enough alarm, to make the Ottomans believe the invasion force offshore was larger than it really was. Mechanical trouble with her torpedoes limited what she could actually sink, and she was eventually holed by gunfire and scuttled, her crew taken prisoner. But she had proved that the straits could be forced by a single vessel, which gave the wider Allied effort a rare moment of hope, out of all proportion to the damage she actually inflicted.
Why did the campaign grind on for months?
With the early assault contained, both sides dug in and reinforcements began arriving. On 6 and 7 May the Allies attacked again, trying to take the high ground beyond the village of Krithia, and again stalled short of their objective. Water was a constant problem; the Australians had brought several thousand horses with them, but there was nowhere to water them on the beaches, and in the end most were shipped back to Alexandria without ever landing.
On 19 May the Ottomans attempted a major counter-offensive of their own, hoping to throw the invaders back into the sea. Allied reconnaissance had spotted the build-up in advance, and the attack was a disaster for the defenders: something like 13,000 Ottoman casualties, of whom around 3,000 were killed, against fewer than 700 Australian and New Zealand casualties. The losses were severe enough that a truce was arranged so the Ottomans could bury their dead, producing, for a day, something of the same strange camaraderie that had appeared on the Western Front the previous Christmas. Fighting continued through June and July with little ground gained on either side, and even in the lulls a kind of routine took hold: soldiers on both sides sometimes left gifts in no man’s land, dates and sweets from the Ottoman trenches, tins of beef and cigarettes from the other direction, small gestures between men who spent the rest of their time trying to kill each other.
By August, Hamilton had settled on a new plan: seize the Sari Bair range, including the heights of Chunuk Bair and Hill 971, while a fresh force landed further north at Suvla Bay. Both sides had grown considerably since April, the Entente from five divisions to fifteen, the Ottomans from six to sixteen, but the result was the same stubborn deadlock. As summer wore on, conditions in the trenches deteriorated badly. Unburied bodies swelled and rotted between the lines, drawing swarms of flies, and dysentery spread through the cramped, poorly supplied Allied positions at Anzac and Helles alike. The Ottoman trenches suffered just as badly from disease.
How did the Allies manage to leave without disaster?
By late autumn it was clear the campaign could not succeed, and planning turned to withdrawal, a manoeuvre every commander dreaded, since a retreating army pinned against the sea made an easy target. A three-day rainstorm at Suvla in late November, followed by a blizzard in early December, only sharpened the urgency: trenches flooded, men drowned, and the following freeze killed still more from exposure.
The evacuation of Anzac and Suvla was fixed for late December, with the last men leaving before dawn on the 20th. Troop numbers were quietly thinned out over the preceding fortnight, and a series of small deceptions kept the Ottomans from noticing. One soldier, William Scurry, rigged a self-firing rifle triggered by water dripping into a pan, so that isolated positions could still return fire long after the men who held them had gone. At Anzac Cove, troops held their fire and their silence for hours at a stretch until curious Ottoman soldiers came forward to investigate, then opened up, a trick that discouraged any further probing when the real evacuation began. A mine detonated beneath the Nek killed seventy Ottoman soldiers on the final night, and the last Australians left without losing a single man, though enormous quantities of stores and supplies had to be abandoned.
Helles held on a little longer, and here the Ottomans were watching closely for exactly the signs of withdrawal the Allies had disguised so well at Anzac. Liman von Sanders used the extra time to bring up reinforcements and attacked the British at Gully Spur on 7 January 1916, at real cost and to no effect. The following night, under cover of a naval bombardment, British troops fell back to the beaches and boarded boats from makeshift piers, the last of them leaving in the small hours of 8 January. As at Anzac, guns, ammunition and stores were left behind, and hundreds of horses were destroyed rather than handed to the Ottomans. It was, by any measure, a strange note to end on: the one part of the entire campaign that went almost exactly to plan was the retreat.
So why does Gallipoli still matter?
By any military measure, Gallipoli was an Allied failure. Eight months of fighting never opened the Dardanelles or the supply route to Russia it was meant to secure, and both sides paid an appalling price for it, something in the region of 250,000 casualties each. Winston Churchill, who had championed the naval attack from the start, was forced to resign as First Lord of the Admiralty, and his political career took years to recover. Russia, still cut off from its western allies, drifted further into the shortages and unrest that would help bring down the Tsar within two years.
And yet the campaign’s afterlife has mattered as much as the campaign itself. For Australia and New Zealand, Gallipoli became something close to a founding story, the moment their young forces first fought as nations in their own right rather than as parts of the British Empire, still marked every year on ANZAC Day. For Turkey, the successful defence of the peninsula, and the emergence of Mustafa Kemal as the man who had read the ground correctly when his superiors had not, became a cornerstone of national pride. Within a few years he would lead the Turkish War of Independence and take the name history remembers him by: Atatürk, father of the Turks.
Gallipoli is visited on Day 4 of Esplora Travel’s Treasures of Western Turkey tour, the day after arriving in Çanakkale and the day before crossing the straits to Troy, standing on the opposite shore of the very water this whole campaign was fought to open.
Latest posts & articles
When you travel with us, our aim is to give you the very best travel experience. We travel in small groups of like-minded people with expert local guides.